一、安装sphinx
1、创建新项目
1
2
3
4
5
6
7
8
9
pip install sphinx
mkdir doc
cd doc/
sphinx-quickstart
> Separate source and build directories (y/n) [n]: y
> Project name: ClientEngine
> Author name(s): Van
> Project release []:
> Project language [en]: zh_CN
2、编译html文件
1
2
3
4
sphinx-build -b html ./source ./build

# 清理编译结果
make clean
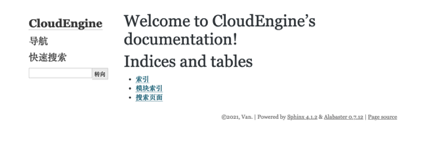
打开./doc/build/index.html:
二、修改主题
1、安装sphinx_rtd_theme
1
pip install sphinx_rtd_theme
2、修改./doc/conf.py文件
1
2
3
4
5
import sphinx_rtd_theme

# html_theme = 'alabaster'
html_theme = "sphinx_rtd_theme"
html_theme_path = [sphinx_rtd_theme.get_html_theme_path()]
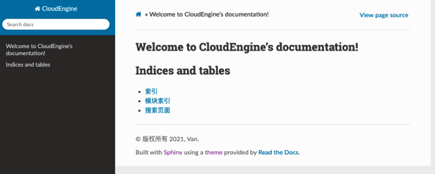
重新打开index.html,新的主题如下图:
三、支持Markdown
1、安装myst-parser
1
pip install myst-parser
2、修改./doc/conf.py文件
1
2
3
4
extensions = [
    "myst_parser"
]
source_suffix = ['.rst', '.md']
3、创建readme.md文件,原文如下
1
2
3
4
5
6
7
8
9
# sphinx支持markdown

## 1、md代码段测试

```python
def add(x, y):
    return x + y
```
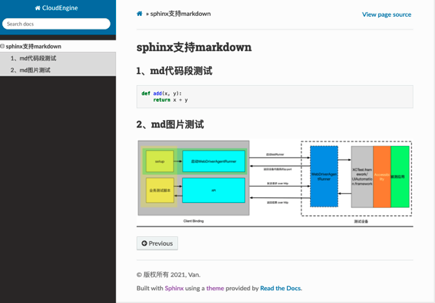
4、支持markdown中插入图片
在./doc/source新建 img 文件夹,放入对应的图片

在readme.md中添加图片
1
2
3
4
## 2、md图片测试

5、修改index.rst文件,添加.md文件的文件名
1
2
3
4
5
6
7
8
========
使用文档
========

.. toctree::
   :maxdepth: 1

   readme
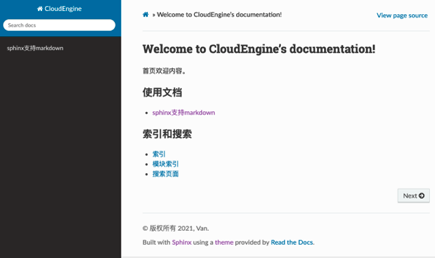
6、重新build,查看结果
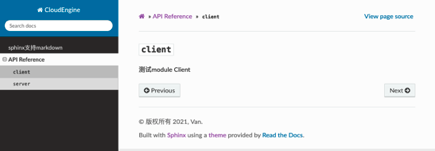
四、使用autoapi插件支持python api自动生成
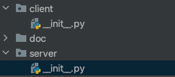
1、新建两个python package: client、server
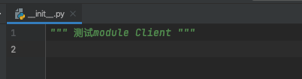
2、在__init__.py文件中添加模块说明:
3、安装autoapi
1
pip install sphinx-autoapi
4、修改./doc/conf.py文件,使用autoapi插件
1
2
3
4
5
6
7
8
extensions = [
    "recommonmark",
    'autoapi.extension'
]

# -- Options for Autoapi output -------------------------------------------------
autoapi_dirs = ['../../client', '../../server']
autoapi_type = 'python'
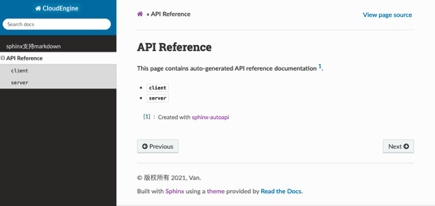
5、修改index.rst文件
=================
API  Reference
=================
.. toctree::

    autoapi/index
6、重新编译后查看
五、使用NumPy风格的docstring
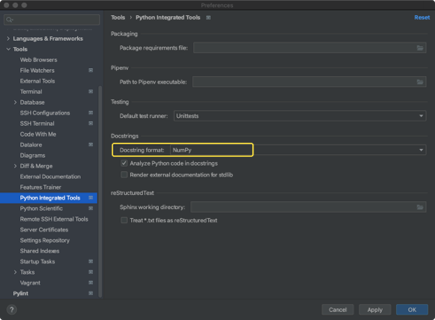
1、修改Pycharm配置-Tools-Python Integreted Tools-Docstrings-Docstring format,改为NumPy
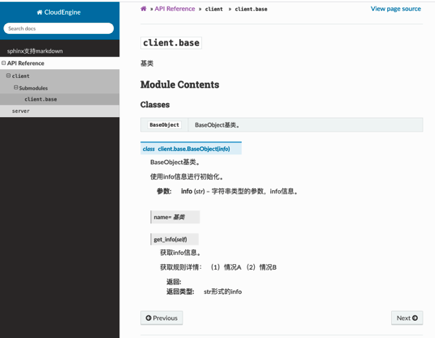
2、新增./client/base.py文件,编写docstring,注意各段之间需要额外多空一行。
1
2
3
4
5
6
7
8
9
10
11
12
13
14
15
16
17
18
19
20
21
22
23
24
25
26
27
28
29
30
31
32
33
""" 基类 """


# -*- coding: UTF-8 -*-
class BaseObject:
    name = "基类"

    def __init__(self, info):
        """ BaseObject基类。

        使用info信息进行初始化。

        Parameters
        ----------
        info : str
            字符串类型的参数,info信息。

        """
        self.info = info

    def get_info(self):
        """ 获取info信息。

        获取规则详情:
        (1)情况A
        (2)情况B

        Returns
        -------
            str形式的info

        """
        return self.info
3、安装napoleon,用于匹配docstring的样式
1
pip install sphinxcontrib-napoleon
4、修改./doc/conf.py文件,使用napoleon插件,设置napoleon_google_docstring则会使用NumPy风格的样式。
1
2
3
4
5
6
7
8
extensions = [
    "recommonmark",
    'autoapi.extension',
    'sphinxcontrib.napoleon'
]

# -- Options for napoleon output -------------------------------------------------
napoleon_google_docstring = False
5、查看编译后效果
六、跳过一些文件
1、跳过仓库中venv等目录
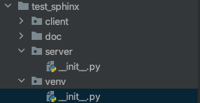
修改conf.py
1
2
3
4
5
6
7
import os
import sys
BASE = os.path.abspath('../..')
sys.path.insert(0, BASE)

# -- Options for Autoapi output -------------------------------------------------
autoapi_dirs = [os.path.join(BASE, 'client'), os.path.join(BASE, 'server')]
2、跳过模块中的一些目录(client/lib)
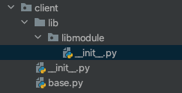
修改conf.py
1
2
# -- Options for Autoapi output -------------------------------------------------
autoapi_ignore = ['*lib/*']
七、配置Gitlab CI
1、在仓库根目录下配置.gitlab-ci.yml文件:
1
2
3
4
5
6
7
8
9
10
11
12
13
14
15
16
17
18
19
20
21
22
23
24
25
26
27
28
29
30
image: python:3.7-alpine

test:
  stage: test
  script:
  - pip install -U sphinx
  - pip install -U sphinxcontrib-napoleon
  - pip install -U sphinx_rtd_theme
  - pip install -U myst-parser
  - pip install -U sphinx-autoapi
  - sphinx-build -b html ./docs/source public
  only:
  - branches
  except:
  - master

pages:
  stage: deploy
  script:
  - pip install -U sphinx
  - pip install -U sphinxcontrib-napoleon
  - pip install -U sphinx_rtd_theme
  - pip install -U myst-parser
  - pip install -U sphinx-autoapi
  - sphinx-build -b html ./docs/source public
  artifacts:
    paths:
    - public
  only:
  - master
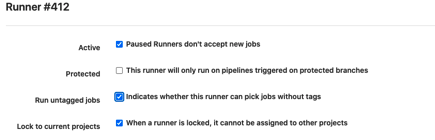
2、配置gitlab runner(已有runner可跳过)
1
2
3
4
5
6
7
8
9
# 在mac上安装gitlab runner
sudo curl --output /usr/local/bin/gitlab-runner "https://gitlab-runner-downloads.s3.amazonaws.com/latest/binaries/gitlab-runner-darwin-amd64"
sudo chmod +x /usr/local/bin/gitlab-runner
gitlab-runner register
# 根据项目settings/ci_cd#js-runners-settings配置url和token,自定义tag
# Enter an executor:
docker
# Enter the default Docker image (for example, ruby:2.6):
python:3.7-alpine
修改runner配置,支持untagged jobs
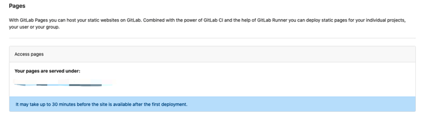
3、提交代码到其他分支,会运行test下的步骤;push或MR到master分支,会运行pages下面的步骤;
pipeline运行完成后,页面会部署到Gitlab Pages中显示的url。